


Table of Contents
This is a fully structured, numbered, and optimized Season 4 Missions Guide for Arena Breakout: Infinite – Airport Hunt. All 60 missions are listed in exact order, clearly grouped by progression stage, with a Quick Completion Checklist for casual players.
How Season 4 Missions Work (Read First)
- Only Found in Raid (FIR) items count.
- Items placed in Operator loot storage do NOT count toward missions.
- Most missions allow only 1–2 active quests at a time.
- For “Kill enemies in X area” missions, you only need to stand inside the zone.
- Team progress is inconsistent this season: some objectives count for everyone, others only for you.
Mission Overview Table
Purpose: Allows players to instantly assess mission difficulty, map dependency, and risk before deployment.
| Mission # | Mission Name | Map | Difficulty | Solo Friendly | Key Risk |
|---|---|---|---|---|---|
| 1 | Peaceful Obstacle | Farm | Easy | ✅ Yes | Low enemy density |
| 5 | Silent Cleanup | Valley | Medium | ✅ Yes | Long rotation routes |
| 12 | Supply Interruption | Farm | Medium | ⚠️ Partial | High PMC traffic |
| 18 | Hidden Threat | Valley | Hard | ❌ No | Ambush-heavy zones |
| 22 | Tactical Sweep | Airport | Hard | ❌ No | Long sightlines |
| 26 | Enemy Identification | Airport | Hard | ❌ No | High-tier AI |
| 31 | Reinforced Resistance | Airport | Very Hard | ❌ No | Armor-piercing enemies |
| 36 | Secured Withdrawal | Airport | Very Hard | ❌ No | Extraction campers |
| 41 | Chain of Command | Airport | Extreme | ❌ No | Multi-objective PvP |
| 45 | Black Site Exposure | Airport | Extreme | ❌ No | Limited cover |
| 49 | Hostile Airfield | Airport | Extreme | ❌ No | Boss proximity |
| 52 | Last Defensive Line | Airport | Extreme | ❌ No | Ammo drain |
| 56 | Final Confirmation | Airport | Extreme | ❌ No | Late-match PvP |
| 59 | Endgame Protocol | Airport | Extreme | ❌ No | Squad-only viable |
| 60 | Absolute Control | Airport | Extreme | ❌ No | Full-map aggression |
Wiki Note:
Difficulty reflects average player completion rate, not theoretical gear potential.
Season 4 Missions – Part 1 Behind the Curtains (Missions 1–20)
1. Peaceful Obstacle (Farm)
- Destroy the supplies at the Recycling Station Hut in Farm.
- Destroy the supplies at the Motel Military Tent in Farm.
How to Complete:
Deploy to Farm and move toward the Recycling Station first. Interact with the supply crates to destroy them. Then rotate toward the Motel area and locate the military tent behind the main building. Destroy the second supply cache and extract safely.
2. The Long Game (Farm)
- Interact at Wheatfield Farmhouse.
- Interact at Cemetery Hut.
How to Complete
Both interaction points are static. Approach each location carefully, clear nearby enemies, and interact with the marked objects. Order does not matter, but surviving the raid is recommended to avoid repetition.
3. Letter from Abyss (Northridge)
- Bring a Signal Jammer into the raid
- Stay at Lakeside Helicopter for 45s
- Interact at Access Bridge
How to Complete
Equip a Signal Jammer before deployment. Reach the Lakeside Helicopter area and remain within the zone until the timer completes. Afterward, move to the Access Bridge and interact with the objective marker.
4. Viper’s Tongue (Northridge)
- Eliminate 6 enemies at Cable Car, Parking Lot, or Hotel
How to Complete:
Target high-density enemy zones. The Cable Car Station and Hotel are the most consistent spawn areas. Eliminate six enemies in any combination across these locations before extracting.
5. The Bait (Farm)
- Deliver 20 miscellaneous paper items found in the Dark Zone.
- Retrieve the Intel document from the second floor of the House in Farm.
How to Complete:
Paper items include Sticky Notes, Old Books, Notebooks, Desk Calendars, Hardcovers, Documents, Comics, Folders, Vass’ Journal, in Document Boxes (100% paper spawns). After collecting 20, enter the Farm House and retrieve the intel from the second floor.
6. Black Box (Farm)
- Complete 4 urgent missions as a team in the Farm map
How to Complete:
Urgent Missions are limited to 4 per raid on Farm. Immediately rush to acquire them at the start of the raid. All four must be completed successfully within team play to finish the mission.
7. Synergy (Valley)
- Eliminate 6 enemies at Small Factory / Courtyard and Supply Camp.
How to Complete
Kills must occur while you are inside the named zones. Rotate clockwise between objectives to minimize travel time and reduce PvP exposure.
8. Burning Bridges (Valley)
- Complete 1 match on any difficulty in Valley.
How to Complete
Simply deploy into Valley and extract successfully. No combat requirements apply.
9. Undercurrent (Farm)
- Eliminate 6 enemies at the Stable, Recycling Station, and Motel
- Go to the Artificial Lake Hut in Farm and search 1 unsearched home computer.
How to Complete
Kills can be spread across the listed locations. Once eliminations are complete, interact at the Artificial Lake to finish the mission.
10. Frontline Reconnaissance (Valley)
- Carry a Mountain Spring Water + Biscuit
- Interact twice at the Abandoned Shack
How to Complete
Bring both items into the raid. Reach the Abandoned Shack and interact twice to place them. Extraction is optional but recommended.
11. Tooth for a Tooth (Valley)
- Complete 4 urgent missions in Valley.
How to Complete
Urgent Missions can be completed across multiple raids. Team completion counts. Prioritize early-raid objectives for efficiency.
12. Protection and Responsibility (Farm)
- Eliminate 3 operators on the east side of the Farm.
- Go to the Villa in the Farm and place the letter.
How to Complete:
The Farm map is divided by the main road. Stay on the eastern (right) side only. Eliminate three operators near Villa, Stables, or Eastern Fields. Afterward, enter the Villa and place the letter at the marked location.
13. Risk Management (Northridge)
- Eliminate 6 enemies with a suppressed marksman rifle in Northridge.
How to Complete
Equip a marksman rifle with a suppressor. Only suppressed kills count. Engage enemies from mid-range to reduce detection and third-party interference.
14. Damage Control (Farm)
- Search 2 unsearched encrypted safes in Farm.
- Extract with 350k+ Koen in a single raid.
How to Complete
Encrypted safes are high-risk. Secure loot first, then avoid unnecessary fights. Koen value must be present at extraction.
15. No Defiance (Valley)
- Fill the activity bar at Noan Courtyard and Small Factory
- Thoroughly investigate the Noan Courtyard in the Valley and extract successfully. Progress +10 for each container searched, +20 for every enemy eliminated, and +10 for every minute survived
- Thoroughly investigate the Small Factory Basement in Valley and extract successfully. Progress +10 for each container searched, +20 for every enemy eliminated, and +10 for every minute survived
How to Complete
Activity increases by killing enemies, looting, and surviving inside the zones. Do not leave the area until the bar is fully filled.
16. Frog in a Wall (Valley)
- Search 3 unsearched suitcases at the RV Camp.
- Earn 1,000,000 Koen from the Market.
How to Complete
Suitcases must be unopened. Market earnings are cumulative and do not require extraction.
17. Support the Flank (Farm)
- Eliminate 3 operators on the West Side of Farm
- Extract from Farm 1 time
How to Complete:
Focus exclusively on the west side (left) of the main road. Player operators commonly appear near Grain Trade Center, Barn, and Western Fields. Secure three confirmed kills, then extract.
18. Special Operation (Valley)
- Eliminate 3 operators in Valley.
How to Complete:
Operators frequently rotate through Eastern Valley and River Crossings. Maintain elevation advantage and confirm kills. Extraction is not required unless stated.
19. Good Intentions (Armory)
- Eliminate 6 enemies at the Armory Periphery.
How to Complete
Kills must occur outside the main Armory interior. Focus on perimeter patrol routes.
20. Respect (Armory)
- Deliver 20 miscellaneous computer parts found in the Dork Zone.
- Place the intel document ot the Underground Intelligence Center (B1) in Armory.
How to Complete:
Computer parts include CPUs, Circuit Boards, Hard Drives, Power Modules, and similar electronics. After collecting 20, infiltrate the Armory and place the intel at the marked underground location.
Season 4 Missions – Part 2 Echoes of the Past (Missions 21–40, Airport Unlock Phase)
21. Surprise Discovery (Valley)
- Extract vlo the Abandoned Shack in Valley 1 time
- Craft 120 rounds of 5.7x28mm L191 ammo at the Trophy Room Workbench.
How to Complete:
First, craft the required ammunition in the Hideout Trophy Room. Then deploy to Valley and extract specifically through the Abandoned Shack to complete the mission.
22. Rally (Valley)
- Go to the Port In Valley and stay for 60 seconds. Enter Valley carrying Portable Transcelver.
- Eliminate 6 enemies in Port.
How to Complete
Remain inside the Port zone for the full timer, then complete eliminations. Walkie-Talkie must be brought into the raid.
23. Bad Omen (Farm)
- Go to the Stable Hut in Farm and investigate the clues.
- Thoroughly Investigate the Motel in Farm. Progress +10 for each container searched, +20 for every enemy eliminated, and +10 for every minute survived.
How to Complete
Interaction must be completed first. Activity bar fills through combat, looting, and survival inside the Motel.
24. Secret Southwest Passage (Airport)
- Scout the inside of the Control Area within the designated area of Ticket Hall 2F In Alrport. Enter Airport carrying Rangefinder Binoculars.
- Open 3 car trunks in Airport.
How to Complete
All objectives can be done in one raid. Trunks are found in parking areas and service roads.
25. Investigation (Airport)
- Eliminate 8 White Wolves in Airport.
- Enter Airport wearing KSS2 Tactical Helmet and Spartan B Body Armor.
- Be equipped with an M4A1 assault rifle.
How to Complete:
Ensure all gear requirements are met before deployment. White Wolves commonly patrol terminals and hangars. Eliminate eight while keeping the required loadout equipped.
Mini Route Tip (Hard Mission):
Clear Hangar routes first for safer engagements. Avoid terminal choke points early. White Wolves respond aggressively to sound – control recoil and reposition often.
26. Close Encounters (Airport)
- Search 4 unsearched Small Safes in Airport.
How to Complete
Small Safes are commonly found inside office rooms, maintenance areas, and side corridors. You must personally open safes that were not previously looted. Team progress does not count for this mission.
Mini Route Tip (Hard Mission):
Start near the outer terminal offices and rotate inward along the first ring. Avoid rushing the Control Area early; hit low-traffic side rooms first to secure uncontested safes before PvP pressure increases.
27. Coordinated Entry (Airport)
- Interact at Aircraft (Outdoor Exhibition)
- Interact at Vehicle (Parking Lot)
- Interact at Hole in Wall (Control Tower)
28. Pincer Movement (Airport)
- Loot 15 food provision items.
- Use the Supply Retrieval Device.
- Extract with over 750,000 Koen.
How to Complete
Focus on cafeterias, storage rooms, and staff areas for food items. Activate the Supply Retrieval Device once your loot value is secured. Extraction value must be counted before exiting the raid.
Mini Route Tip (Hard Mission):
Farm food early in outer terminal zones, then rotate inward only after reaching 600k+ Koen. Avoid prolonged fights – survival matters more than kills here.
29. Frontline Interception (Airport)
- Interact at the Military Zone in the Airport. (Requires Control Area Permission Card)
How to Complete
Obtain a Control Area Permission Card (price is ~2kk of koens) before deployment or during the raid. Enter the Military Zone and interact with the marked objective. Extraction is recommended immediately after.
30. Race Against Time (Airport)
- Extract with 7 Energy Items.
- Deliver 3 Purple or higher-quality Energy Items found in the raid.
How to Complete
Energy items include batteries, powerbank and etc. Purple or higher quality items (Solar panel, Car Battery, and Battery pack) must be found in a raid and turned in later. Do not place them in secure case post-kill storage, as it may not count.
31. Upwind (Airport)
- Eliminate 6 enemies with grenades.
- Extract via the Helicopter Extraction Point (Requires 2 dogtags) in Airport 1 time.
How to Complete
Grenade kills must be confirmed eliminations. Helicopter extraction is mandatory. Dog Tags can be from Operators.
Mini Route Tip (Hard Mission):
Engage clustered enemies near stairwells and choke points. Use stun grenades first, then lethal grenades. Secure Dog Tags before calling the helicopter to avoid last-minute losses.
32. Next Battlefield (All Maps)
- Extract with a total of 3,000,000 Koen across raids.
- Deliver 3 Gold miscellaneous items found in the raid.
How to Complete
Koen value accumulates over multiple raids. Gold miscellaneous items must be extracted safely and turned in later. Market-bought items do not count.
33. Abandoned Airport (TV Station)
- Thoroughly Investigate the Parking Lot In TV Station. Progress +10 for each container searched, +20 for every enemy eliminated, and +10 for every minute survived.
- Team Objective. Search 7 unsearched Business Sultcases in TV Station.
How to Complete
Remain active in the Parking Lot area until the activity bar fills. Business suitcases are commonly located inside offices.
Mini Route Tip (Hard Mission):
Clear Parking Lot early, then rotate clockwise through business offices. Avoid mid-map crossings late raid – snipers frequently camp sightlines once the timer drops below 20 minutes.
34. Signal (TV Station)
- Eliminate 3 operators with AMB‑17 / T191 / U191 (only your kills count).
How to Complete
Only your own kills count. Team eliminations do not progress the mission. Weapon choice is mandatory – kills with other weapons will not register.
35. Building a Stronghold (Airport)
- Team Objective. Eliminate 10 enemies on the north shore of the Artificial Lake (Fuel Storage, Construction Site, etc) in the Airport.
- Search 3 unsearched encrypted safes in Airport.
How to Complete
Both objectives can be completed in one or multiple raids. Encrypted Safes are high-risk targets – approach after clearing nearby enemies.
36. Lockdown (Airport)
- Search 10 unsearched biscuit tins in Airport.
How to Complete
Use the interactive map to locate Biscuit Tin spawns. Only unopened containers count. This mission is best done on Lockdown or Forbidden difficulty.
Mini Route Tip (Hard Mission):
Run a perimeter route along maintenance corridors and storage rooms. Avoid central combat zones. Speed and stamina boosters significantly reduce exposure during container-heavy routes.
37. Ambushed (Airport)
- Complete 3 Urgent Missions as a team in Airport.
How to Complete:
Urgent Missions must be accepted quickly and completed cooperatively. Airport Urgent Missions are more combat-heavy, so coordinated team movement is critical.
38. Old Rival (Airport)
- Carry a T-147 Individual Communication Device Into Airport.
- Place T-147 Individual Communication Device at the Military Post in Airport.
- Bring out 2 primary weapons from Alrport.
How to Complete
The Military Radio (~175k koens) must be brought into the raid. Main Weapons include primary firearms only. Both weapons must be extracted successfully.
39. The Trap (Airport)
- Search 6 unsearched Dumpsters in Airport.
How to Complete
Dumpsters are primarily located in service corridors, parking areas, and behind terminal buildings. Watch for ambushes – these areas are common PvP traps.
40. Reckless Advance (Airport)
- Eliminate or assist in eliminating 3 operators outside the Control Area In Alrport.
How to Complete
Kills must occur outside the Control Area boundaries. Normal or Lockdown modes are recommended during off-peak hours for easier Operator encounters.
Mini Route Tip (Hard Mission):
Hold long sightlines near outer entrances and maintenance roads. Let Operators rotate toward Control Area, then intercept them before they cross into the middle zone.
Season 4 Missions – Part 3 Twilight’s Flag (Missions 41–60, Endgame)
41. Emergency Measures (Airport)
- Extract 15 medical miscellaneous items in Airport.
- Craft 120 rounds of .45 caliber AP ammo at the Trophy Room Workbench.
How to Complete
Medical miscellaneous items include bandages, syringes, NaCl, and first-aid components. They must be extracted safely. Craft the ammo only after the mission becomes active. To craft this ammo, you will need:
- Data Cable 1x (~21k Koens),
- Bosun’s Whistle1x (~17k Koens),
- Blue Gunpowder 2x (~7k Koens each).
The process of creating these 120 bullets takes approximately 6 hours (in real time).
Mini Route Tip (Hard Mission):
Loot medical rooms and service corridors first, then disengage early. Overstaying dramatically increases Operator pressure in Airport mid-game.
42. Breakout (Airport)
- Eliminate 1 operator in the Control Area (Middle) in Airport.
- Extract via Central Elevator 1 time.
How to Complete
The Operator kill must occur inside the Control Area. Afterward, move directly to the Central Elevator and extract successfully.
Mini Route Tip (Hard Mission):
Hold second-floor sightlines overlooking Control Area entrances. Let Operators push inward before engaging to avoid fighting multiple teams simultaneously.
43. Mission Failed (TV Station)
- Bring out 15 purple or higher-quality miscellaneous Items from TV Station.
- Extract from the Main Entrance of TV Station 1 time.
How to Complete
Only purple-quality or higher miscellaneous items count. Market items do not qualify. Extraction must be done via the Main Entrance.
44. Edelweiss Past (Valley)
- Enter Valley wearing SH18 Military Helmet, 6B23 Body Armor, and holding an AKM assault rifle.
- Go to the Radar Station in Valley and stay for 30 seconds.
- Go to the Frontier Positions in Valley and stay for 30 seconds.
- Go to the Supply Camp in Valley and stay for 30 seconds.
How to Complete
All three locations must be visited in one raid. Timers only count while standing inside the zone.
Mini Route Tip (Hard Mission):
Rotate Radar → Frontier → Supply Camp clockwise. Avoid gunfights unless forced – timers reset if you leave the zone prematurely.
45. Strange Things at the Farm (Farm)
- Team Objective. In Lockdown or Forbidden Zone, eliminate 2 bosses in the Farm.
How to Complete
Boss spawn rates do not increase with difficulty. Play what you can survive consistently. Team play greatly improves coverage of spawn locations. Bosses spawn in places such as the Grain Trade Center, Motel, Stables, Small Hall, and Loading Area.
46. Ghost of the Past (Multiple Maps)
- In Lockdown or Forbidden Zone, search air drop containers 3 times In Farm.
- In Lockdown Difficulty, search air drop containers 3 times In Valley.
- In Lockdown or Forbidden Zone, search air drop crates 2 times in TV Station.
- In Lockdown or Forbidden Zone, search alr drop containers 3 times in Armory.
How to Complete
All containers must be unsearched and found personally. Progress persists across raids and maps. Focus on one map per session.
47. Team Annihilation (TV Station)
- In Lockdown or Forbidden Zone, search 7 unsearched medical containers in TV Station.
- In Lockdown or Forbidden Zone, extract via the Elevator in TV Station 1 time.
How to Complete
Containers must be unopened. Team searches may not count reliably – open them yourself. Elevator extraction is mandatory.
48. Crow Feather (Northridge)
- Search 1 unsearched safe in each of the following locations: (Camp Services, Sawmill or Sewage Plant, Comms Station, Cable Car Station).
How to Complete
All safes must be opened personally. Progress can be split across multiple raids. Use the keys to access the safe if necessary.
Mini Route Tip (Hard Mission):
Start the Cable Car first, then rotate downhill. Safes are frequently contested late raid – early movement is critical.
49. Quick on Your Feet (Northridge)
- Eliminate 5 enemies in Northridge with ML lever action Rifle.
How to Complete
Only ML rifle kills count. Suppressors are allowed. Enemy type (Operator or Scav) does not matter.
50. Edelweiss Return (Valley – Lockdown)
- In Lockdown Difficulty, eliminate 8 enemies in the Valley while both your legs are broken.
How to Complete
This mission only works in Lockdown. Break your legs intentionally (controlled fall or grenade splash), then secure kills before extracting or dying. Enemy type (Operator or Scav) does not matter for this mission.
Mini Route Tip (Hard Mission):
Pre-clear a dense area, then break legs safely and finish remaining enemies at close range. Painkillers help, but movement remains extremely limited.
51. Additional Troops (Armory)
- In Lockdown or Forbidden Zone, use the Supply Retrieval Device in the Armory to bring out a total of 750,000 worth of loot.
- In Lockdown or Forbidden Zone, extract vlo the Underground Canal in Armory 1 time.
How to Complete
Koen value must be present at extraction. The Underground Canal exit requires activating the internal lever first.
52. Counterattack (TV Station)
- In Lockdown or Forbidden Zone, use M84 Flashbang to affect enemies 6 times In TV Station.
- Complete 3 matches on any difficulty in TV Station.
How to Complete
Hits do not require kills – enemy stun confirmation is enough. Matches can be on the TV Station map. Enemy type (Operator or Scav) does not matter.
53. Heavy Punch (Airport)
- Eliminate 8 Blackgold elites with AEK / AK‑12 / AMB‑17 in Airport.
How to Complete
Only elite Blackgold enemies count. Weapon requirement is strict – kills with other firearms do not register.
Mini Route Tip (Hard Mission):
Push inner Airport zones after early rotations. Blackgold squads tend to cluster mid-raid once outer pressure increases.
54. Window of Opportunity (Airport)
- Bring out 15 gold or higher-quality miscellaneous Items from Airport.
How to Complete
Items must be found in a raid. Gold quality or higher only. It’s easy to do because airports are a gold printer. Survival matters more than PvP.
55. The Final Showdown (Airport)
- Investigate the Lounge on Control Tower 2F in Airport.
- Go to the Office on Control Tower 2F In Alrport to Investigate.
- Investigate the Observation Room on Control Tower 2F in Airport.
- Go to the Control Center Storage Room on Control Tower 1F In Airport to Investigate.
How to Complete
All interactions must be completed inside the Control Tower. Order does not matter, but survival is mandatory. So everything that you’re investigating will be marked on the map there for you. Just open it up. Exclamation point. Good to go.
Mini Route Tip (Hard Mission):
Clear floor by floor from top to bottom. Leaving the tower mid-mission risks losing progress due to heavy Operator traffic.
56. Waving Flag (Airport)
- Eliminate 10 enemies inside the Control Tower in Airport.
- Search 2 unsearched encrypted safes inside the Control Tower.
How to Complete
Both objectives must be completed inside the Control Tower area. Enemies can be Scavs, Operators, or elite units. Only encrypted safes count – small safes do not register.
Mini Route Tip (Hard Mission):
Rush the tower early before teams lock it down. Clear floor by floor upward, then backtrack for safes once gunfire pressure drops.
57. By Name (TV Station)
- In Lockdown or Forbidden Zone, extract via the Backstage Area in TV Station 1 time.
- In Lockdown or Forbidden Zone, extract via the Interview Room (Backstage) in TV Station 1 time.
- In Lockdown or Forbidden Zone, extract via the Freight Elevator in TV Station 1 time.
How to Complete
Each extraction must be completed in separate successful raids. All extractions are RNG-based and only appear in Lockdown or Forbidden difficulty. It might take you multiple times to do. If you don’t like TV, I’m so sorry. This one, there’s no way around it. It’s tough.
Mini Route Tip (Hard Mission):
Enter raids specifically hunting one exit. If it’s unavailable, disengage early – forcing PvP wastes time and increases death risk.
58. Predator (TV Station / Airport)
- In Lockdown or Forbidden Zone, search unsearched safes 5 times in TV Station or Airport excluding small safes).
- Successfully extract from TV Station or Airport once.
How to Complete
Safes must be medium or large (encrypted or keyed). Progress persists across raids. Extraction can be on either map.
Mini Route Tip (Hard Mission):
Use keyed rooms during off-peak hours. Airport control rooms and TV Station offices are safest after mid-raid rotations finish.
59. Golden Opportunity (TV Station)
- Team Objective. In Lockdown or Forbidden Zone, go to the Central Control Area in TV Station and investigate thoroughly. Progress +10 for each container searched, +20 for every enemy eliminated, and +10 for every minute survived
- In Lockdown or Forbidden Zone, go to The Vault in the TV Station and hide the file.
How to Complete
Investigation progress increases by:
- Searching containers
- Eliminating enemies
- Time survived
Once complete, move to the Vault and place the file to finish the mission.
Mini Route Tip (Hard Mission):
Avoid rushing the vault early. Build investigation progress quietly first, then rotate late when squads have thinned out.
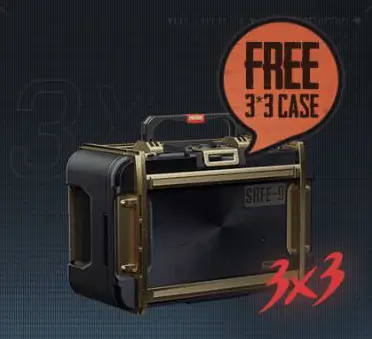
60. Deja Vu – Final Mission for Free 3×3 Titanium Case (Farm)
- Survive 15 minutes in the Farm.
- Go to the Cemetery in Farm and observe the gravestone.
How to Complete
Survive for a total of 15 minutes on the farm, go to the Cemetery and observe the gravestone.
Boom. That’s it. Your 3×3 Titanium Case is now unlocked. Now, it was only that easy, huh? It was only that easy. It is a little bit of a grind. I won’t lie to you, but it is totally worth it. So, if you guys are having any trouble with this in the comments, let me know.
Mini Route Tip (Hard Mission):
Hide near low-traffic zones to farm survival time, then approach the Cemetery late raid when Farm activity drops.
Airport-Only Missions Table (Quick Reference)
This table helps you focus only on Airport-related quests, which dominate the mid and late Season 4 progression.
| Mission # | Mission Name | Core Objective | Difficulty | Est. Time |
|---|---|---|---|---|
| 24 | Secret Southwest Passage | Control Area 2F + car trunks | Medium | 2–3 raids |
| 25 | Investigation | Kill 8 White Wolves | Hard | 3–5 raids |
| 26 | Close Encounters | 4 small safes | Medium | 2–3 raids |
| 27 | Coordinated Entry | 3 interaction points | Easy | 1–2 raids |
| 28 | Pincer Movement | 750k Koen extract | Hard | 2–4 raids |
| 29 | Frontline Interception | Military Zone interact | Medium | 1–2 raids |
| 30 | Race Against Time | Energy items | Medium | 2–3 raids |
| 31 | Upwind | Grenade kills + heli exfil | Hard | 3–6 raids |
| 33 | Abandoned Airport | Activity bar + suitcases | Medium | 2–3 raids |
| 35 | Building a Stronghold | 10 kills + safes | Hard | 3–5 raids |
| 36 | Lockdown | 10 biscuit tins | Medium | 2–4 raids |
| 38 | Old Rival | Military Radio extract | Easy | 1–2 raids |
| 39 | The Trap | 6 dumpsters | Easy | 1–2 raids |
| 41 | Emergency Measures | Med items + ammo craft | Medium | 2–3 raids |
| 42 | Breakout | Operator kill + elevator | Hard | 3–6 raids |
| 53 | Heavy Punch | Blackgold elite kills | Very Hard | 4–8 raids |
| 55 | The Final Showdown | Multi-location interact | Hard | 2–4 raids |
| 56 | Waving Flag | Tower kills + safe | Very Hard | 4–7 raids |
Estimated Time & Difficulty Breakdown (All Missions)
Easy (1–2 raids)
Burning Bridges, Support the Flank, Coordinated Entry, Old Rival, The Trap, By Name
Medium (2–3 raids)
Peaceful Obstacle, The Long Game, Undercurrent, Rally, Close Encounters, Race Against Time, Lockdown
Hard (3–5 raids)
Investigation, Pincer Movement, Building a Stronghold, Breakout, Mission Failed, Heavy Punch
Very Hard (5+ raids)
Upwind, Waving Flag, Edelweiss Return, Ghost of the Past
Top 10 Hardest Season 4 Missions (Beginner Version)
These missions cause the most frustration for new or casual players:
- Waving Flag – High PvP density + confidential safe mechanics.
- Upwind – Grenade kills + helicopter extraction.
- Heavy Punch – Blackgold elites only, specific weapons.
- Breakout – Operator kill inside Control Area + elevator exfil.
- Investigation – White Wolves are highly contested.
- Edelweiss Return – Broken legs condition (Lockdown only).
- Ghost of the Past – Multi-map air container grind.
- Pincer Movement – High Koen extraction requirement.
- Mission Failed – Purple+ misc items + risky extract.
- Strange Things at the Farm – Boss RNG dependency.
Recommended Loadouts – Top 5 Hardest Missions
Below are practical, budget-aware loadouts optimized for survivability and objective completion, not flashy PvP.
1. Waving Flag (Airport – Control Tower)
Goal: 10 enemy kills inside the tower + confidential safe searches
Primary Weapon: M4A1 or AK-12 (low-recoil build)
Ammo: M855A1 / 5.45 BT
Armor: T5 Armor, T4–T5 Helmet with headset
Utility: Smoke grenade x1–2
Why this works: Allows controlled room clearing and safe rotations between floors.
Mini Route Tip: Enter Control Tower from the lower parking side, clear 1F first, then move clockwise up the stairwell. Avoid central stairs early. Rotate floors only after clearing sound cues to prevent being sandwiched.
2. Upwind (Helicopter Zone Mission)
Primary Weapon: AR-15 / AK-74M
Ammo: M855A1 or BP
Armor: T4 Vest + Lightweight Helmet
Backpack: Light
Extras: Frag grenades ×3, stamina injectors
Why it works:
Upwind is about timing and area denial. Grenades clear campers near heli zones, while lighter armor preserves stamina for fast rotations when the extraction window opens.
3. Heavy Punch (Blackgold Elite Elimination)
Primary Weapon: DMR (SKS / M110)
Ammo: High-penetration rounds only
Armor: T5 Vest + T4 Helmet
Backpack: Medium
Extras: Painkillers, spare ammo stack
Why it works:
Blackgold elites punish close-range mistakes. A DMR allows controlled headshots from mid-range, minimizing exposure while still penetrating elite armor consistently.
4. Breakout (Operator Kill + Elevator Extract)
Primary Weapon: SMG (MPX / Vector) or Compact AR
Ammo: AP rounds
Armor: T4 Vest + Helmet
Backpack: Light
Extras: Smoke grenades ×2, flash ×1
Why it works:
This mission is about speed and surprise. SMGs dominate elevators and corridors, while smokes allow safe extraction even when other players camp the shaft.
5. Investigation (White Wolves Engagement)
Primary Weapon: AR with 3×–4× optic
Ammo: BP / M855A1
Armor: T5 Vest + Helmet
Backpack: Medium
Extras: Medkits, one smoke
Why it works:
White Wolves fight in squads and punish bad positioning. A mid-range optic and strong armor let you thin their numbers before committing to close combat.
FAQ – Arena Breakout Infinite Season 4 Missions
Yes. Major seasonal resets refresh mission progress, especially for main progression chains tied to maps like Airport.
Yes. Airport missions feature higher-tier AI, longer sightlines, and frequent PvP engagements, especially in late-game chains.
Early and mid-game missions are solo-friendly. Late-game Airport missions (41–60) are strongly squad-oriented.
Yes. Failed missions can be retried unlimited times unless time-limited by seasonal rules.
Mission rewards are fixed and do not scale with difficulty modifiers or player level.
Yes. Crafting missions must be completed at the correct workbench (e.g., Trophy Room).
Early extraction without completing objectives results in mission failure.
Final Verdict – Is Season 4: Airport Hunt Worth Playing?
Season 4: Airport Hunt is the most structured and skill-demanding season Arena Breakout Infinite has released so far.
The Airport map rewards:
- Smart routing instead of blind rushing,
- Controlled aggression over raw aim,
- And preparation over gear gambling.
Missions feel meaningful, not filler. Even casual players can progress thanks to clearer objectives and flexible completion paths, while experienced players get high-risk, high-reward challenges like Waving Flag and Heavy Punch.
Most importantly, Season 4 proves that Arena Breakout Infinite is evolving beyond a Tarkov-like clone into a more readable, tactical extraction shooter with its own identity.
Bottom line:
If you enjoy methodical gameplay, calculated risk, and missions that actually test decision-making, Airport Hunt is one of the strongest seasons to date.
Note:
This page will be updated with each major Arena Breakout Infinite season to reflect mission changes, removals, or rebalancing.
1 comment
Why recommend a DMR for heavy punch mission when it specifically asks to use Ak 12, Aek or Amb-17? doesnt make any sense