


Table of Contents
The Farm has received a major overhaul in Season 3 Breach. The western edge of the map has been expanded with a new Stables complex and a significantly larger Grain Trade Center, featuring additional buildings, cover, and loot. (Season 2’s Crimson Edge update had already nearly doubled Farm’s size by adding the Wheatfield Farmhouse to the north and a Southeast Village cluster in the far southeast.) Season 3 also adds dynamic weather (rain, fog, storms) on the Farm, so visibility can change mid-raid. In short, Farm is now more sprawling and unpredictable, with new terrain and ambush opportunities. Key map changes include:
-
New Areas: Stables (north of Motel) and expanded Grain Trade Center on the west side. (Recall that Season 2 had already added the raised Wheatfield Farmhouse to the north and a Southeast Village cluster to the southeast.)
-
Dynamic Weather: Raids can shift from clear to fog or rain, affecting sightlines.
-
Additional Cover: More barns, silos, and farmhouses grant alternative flanking routes and sniper perches (especially around the new farmhouse).
Farm Map Access Requirements
Normal:
- Value Req: <450.000 Koens
Lockdown Zone:
- Value Req: >150.000 ~ 1.000.000 Koens
- Costs: 20.000 Koens for entry
Forbidden Zone:
- Unlocks at Level 30
- Value Req: 300.000 Koens
- Costs: 50.000 Koens for entry
New Boss Hecate

New Boss Hecate
Season 2 introduced Hecate, leader of the Abyss Squad, as Farm’s new boss, and she remains active in Season 3. Hecate is highly agile and will flank players unpredictably – a sharp contrast to the original boss, Ajax. Facing Hecate adds a heavy PvE challenge to Farm raids, since she patrols multiple areas rather than staying at one fixed point.
Spawn Locations:
- Small Hall;
- Grain Trade Center.
Hecate Spawn Chance = ~15%
Boss Equipment
T4 SEK Fortress Body Armor, NO helmet, making her slightly more vulnerable to headshots. SIG MPX – fast-firing, accurate SMG, MCX – higher damage assault rifle variant.
Guard Equipment
T3 H-Tac SWAT Body Armor (no helmets), Boss Squad’s weapon: MP5 and M14 7.62×51 mm.
Interactive Farm Map
This interactive map shows the Farm location in Arena Breakout Infinite. It has markers for PMC, Scav, and Boss spawns, extractions, loot, keys, quests, caches, and more.
*To Enable Full-Screen Mode, Press The Button On the Map:![]()
Extractions Points
Here’s a list of all the extraction points available in Arena Breakout: Infinite’s Farm:
| Name | Description | Type | Details |
|---|---|---|---|
| Outpost | The Farm entrance was destroyed during the Civil War. It is now an unguarded fortification. | Fixed | Always available |
| Highway | This expressway connects the southern and northern parts of the city. It is one of the major economic development projects. | Fixed | Always available |
| Artificial Lake | A temporarily closed Artificial Lake. Several abandoned boats are moored around it. | Conditional | Chance: 50%. Approach the evacuation point to see if it is available. |
| Hunter’s Path | A secret passage leading to the mountains. Only local hunters know this path. | Conditional | You can extract without a backpack equipped. |
| Southern Blockade | Many fortifications were built at the Southern Blockade. | Conditional | This extract requires you to have cash on you in-game to use it. You need to pay 15,000 Koen to exract here. Active 10 min after raid start. |
| Path to Northridge | The Checkpoint northeast of the Farm that leads to Northridge. | Chance-based | Chance of Availability 50% |
| Boulder Wall | When constructing the wall, the construction team had planned to move the boulder. However, the excavator never managed to reach the bottom of the boulder, so they had to just build a wall around it. | Fixed | Always available |
| Path to Restricted Area | It was once the only road to the Restricted Area. After the completion of the Highway, people stopped using this road for the most part. | Fixed | Always available |
| Wheatfield Hut | Require specific mission tasks to activate | Conditional | Always available |
| Cemetery | Require specific mission tasks to activate | Conditional | Always available |
| Loading Area Sentry Tower | A Sentry Tower in the north of the Loading Area. | Conditional | Require specific mission tasks to activate. Always available. |
| Recycling Station Sentry Tower | A Sentry Tower in the north of the Recycling Station. | Conditional | Require specific mission tasks to activate. Always available. |
Rotation Tips: Note your spawn side and plan accordingly. East-side spawns (near Bridge or Farmhouse) can clear nearby houses, then push Motel/stables or head out through Outpost. West-side spawns (Grain/Highway side) often loot Grain Trade and Stables first, then push Motel or exit via Highway/Boulder. Always keep an exit in mind: e.g., if approaching 10 minutes, move toward Southern Blockade or Hunter’s Path. Use the new Supply Station Devices to stash valuable loot mid-raid in safe corners – then you can rotate without risking it all. In short: loot greedily early, but time your push so you’re near an exit when the clock (and conditions) change.
The Farm Map Keys
The Farm is the first location that was added to the game, and there are not many keys. These versatile items can unlock extract points, grant entry to restricted zones, and reveal coveted containers containing valuable items.
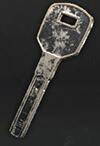
| Image | Name | Description | What’s inside | Durability | Price |
|---|---|---|---|---|---|
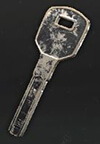 | Recycling Office Key | An old key to the recycling management office under the Farm Bridge. | Pro First-Aid Kit, First Aid Case, Medical Spawns on table | 25 | Unavailable in Season 4 |
 | House Key | A key to the door of the house located in the northeast corner of the Farm. | Used for Quest, Jackets, Office Drawer. | 25 | Unavailable in Season 4 |
 | Stables Warehouse Key | Key to the warehouse near the Farm Stables. | Document Box, Ordinary Jacket, Pro Toolbox. | 75 | ~200k |
 | Loading Area Key | Key to the locked room in the Farm Loading Area, which contains some weapons. | First Aid Box, Large Weapon Case, Long Weapon Case. | 25 | Unavailable in Season 4 |
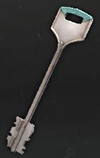 | Graveyard Key | A key carried by Militants. Used to unlock a room near the graveyard in the Farm. You can find valuable items collected by the Militants. | Safe, GYM Bag, Jacket. | 1 | Used for Quest, Jackets, and Office Drawers. |
 | Master Bedroom Key | The key to the main bedroom on the second floor of the Farm Villa. Precious items may be stored there. | Safe, Jacket, PC. | 45 | ~1kk |
 | Motel 201 Key | A key to room 201 in the outer corridor on the second floor of the Farm Motel. | Pro First-Aid Kit, Safe, Rare items on the table. | 45 | ~800k |
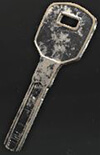 | Barn Office Key | Key to the office on the second floor of the Farm’s Grain Trade Center. There may be valuable items inside. | Safe, Suitcase, PC. | 45 | ~1kk |
 | Motel Main Guest Room Key | Key to the main guest room on the second floor of the Farm Motel. Guests with more discerning tastes choose this room, often leaving valuable Items behind. | Key to the main guest room on the second floor of the Farm Motel. Guests with more discerning tastes choose this room, often leaving valuable items behind. | 30 | ~5kk |
Obtaining and using these keys can dramatically boost your haul on the Farm. In general, plan your route around key targets: grab the Loading Area Key and raid the dock first, then head to the mansion villa or motel once unlocked.
Points Of Interest
If you’re diving into Arena Breakout Infinite and aiming to secure top-tier loot on the Farm map, prioritizing the right points of interest (POIs) is crucial. The Motel and Stables are your go-to spots for high-quality gear, while the Grain Trade Center is a treasure trove for ammo, provisions, and crafting materials.
Motel (Central Complex)
The Motel is Farm’s largest building, packed with locked rooms, multiple safes, and weapon crates. There are three safes (including a free safe outside) and many weapon/medical cases. It was Ajax’s old lair, so expect heavy militia and boss spawns here. PvP is intense: Corridor firefights are common, so bring an SMG or shotgun for close quarters. Key spawns: Motel keys (rooms 201 and Main) unlock additional safes.
Stables
This two-story barn (just north of Motel) “offers dense loot”. It contains one upstairs safe and a large weapon crate downstairs. Because the Stables only have two big doors, it’s an ambush trap: clear corners carefully. Enemy squads (or Hecate’s group) often spawn here. Loot-wise, it’s very valuable (safe/box), but treat it like a hot zone.
Grain Trade Center
This sprawling industrial complex on the farm’s west side yields ammo and crafting materials. It contains many small containers and at least one locked office safe. A particularly lucrative spawn is the pair of ammo boxes on the overhead walkway – these frequently contain premium ammunition. Grind through both warehouse sections thoroughly: you’ll find medical items, provisions, and weapon parts here.
Wheatfield Farmhouse
Added in Season 2, this house sits on raised terrain north of the original Farm area. It offers a sniper’s-eye view over the fields. It contains several loot containers and vantage points for long-range engagements. Because it’s a new area, players should treat it as high-risk/high-reward: it has rich loot but also exposes you to ambushes.
Southeast Village
Also from S2, this is a cluster of huts in the far southeast. Loot here is modest (mostly jackets, ammo boxes, low-tier provisions). Combat is very close-quarters. It is a relatively quiet spawn and offers quick rotation towards the Southern Blockade exit. Don’t expect big finds, but it’s a safe staging area or a flanking route.
Other Notable Spots
The Farm Villa (sometimes called the Farmhouse) on the map’s north, the Bridge area on the road’s south end, and the Loading Dock near the entrance each have loot crates and spawns. The Long Bridge (southwest) often contains jackets and a satellite phone. The Loading Dock to the south of the motel carries two weapon cases behind a locked door – opened by the Loading Area Key.
In summary, Motel/Stables = best weapons & armor (high risk). Grain Center = ammo/parts. Farmhouse/Farms = mid-tier/ambush points. Village/fields = low-tier gear, quick escape. Always check safes first (they hide premium loot under keys).
FAQs
Season 2 greatly expanded the Farm map. It added new zones – the Wheatfield Farmhouse on the north (a high-loot vantage point) and a Southeast Village complex. The update also introduced a new boss, Hecate, who roams the Farm to flank players. Veteran players will notice many new cover routes and loot spots; essentially, the map is twice as large and requires fresh tactics.
The highest-value loot is found in: the Motel (central building with safes and guest rooms); the Stables (dense loot like a safe and weapon crate); and the Grain Trade Center (ammo boxes and crafting items). Additionally, the new Wheatfield Farmhouse contains heavy loot if you’re willing to fight for it. Always check safes first – these are hidden behind key doors and contain premiums.
Stay mobile and communicate. Use the terrain (hilltops, barns) to your advantage, and watch out for flanks in tight corridors. Since Season 2 added more long-range areas, don’t neglect optics on your weapon. Time your loot runs so you’re near an exit when extractions unlock. And above all, be ready for unpredictable boss encounters. With practice and map knowledge, you’ll learn the spawn patterns and loot locations to consistently extract the best gear.
Farm favors versatile weapons that handle both open fields and buildings. Guides rate Assault Rifles (ARs) and SMGs as top choices. These cover medium to close range – perfect for the motel and compound fighting. For example, new Season 2 guns like the MK14 auto-DMR (good at any range) and ARs like the AUG or T79 are strong all-around picks. Submachine guns (MP5, PCC9, UMP45) or even shotguns excel inside the Motel and Stables. Experts also recommend carrying a backup for long sightlines (e.g., a DMR) along with an SMG for indoors. Use high-grade armor and at least T3-T4 mods. In short, loadouts prioritizing AR/SMG combination are most effective on Farm.
Militants and enemy NPCs can be ignored or quickly dealt with. Many advise avoiding prolonged bot fights, as they waste ammo and can reveal you to players. If needed, equip a cheap sidearm (T2-T3 pistol) with low-cost ammo for baseliners, and reserve your main kit for player combat. Remember that Hecate’s guards often carry AP ammo and gear – loot them quickly if you engage. Focus on human threats and the boss; only kill AI if it’s necessary or gives key items. In summary, skirt around bots when possible and save your best ammo for players/Hecate.
Season 2 added several useful tools. The Supplies Retrieval Device lets you stash up to 6 loot slots mid-raid. On Farm, use these devices in safe spots after looting a building – it secures your most valuable gear even if you die later. The update also gives each team a random extraction point with activation conditions, so be ready for unexpected extracts. For example, you might have to survive 10 minutes or carry an item before a team’s exit appears. Finally, Duos mode (2-player teams) is now available, making coordinated two-man play official. In summary, take advantage of the retrieval device to protect loot, and adapt routes for the new dynamic extracts each raid.
Dynamic weather (fog/rain) can reduce sightlines and change engagement distances. Use poor visibility to sneak between buildings or to flank snipers; conversely, avoid open-field fights in clear weather where snipers on the farmhouse can dominate.
Final Advice
The new Farm map is a blend of sprawling open fields, complex vertical terrain, and dense indoor environments. To extract consistently, you must:
- Master both mid-range engagement and tight-quarters combat.
- Control key elevated zones like the Farmhouse and Overpass.
- Prioritize key-driven loot, use supply stashes, and adapt to dynamic boss spawns.
- Stay mobile, communicate, and capitalize on your exit options.
Season 3’s changes make Farm more strategic, rewarding, and unpredictable – a full rebirth for this classic raid. Dive in prepared, and claim that Breach loot!
4 comments
I think it’s the best map for beginner players
É um bom mapa mas peca nos spawn muito próximo.
A atualização procede ? 10 players ainda ?
Poderia Atualizar as informações dos mapas ?