


Table of Contents
Nestled alongside the tranquil Floranpino Sea, the Valley emerges as a picturesque getaway, characterized by its elevated perimeters and sun-kissed central lowlands. Embraced by a protective bay, the southern Beach Villas offer a haven, ideal for safeguarding the riches of the group leader. Perched atop gentle knolls at the heart of the valley, the Noan Courtyard beckons for communal gatherings, while a discreet Small Factory nestled at the foot of the northern mountains adds an air of mystery, casting its enigmatic shadow across the Valley, inviting eager exploration.
- Duration: 40 Mins;
- Player Count: Up to 20;
- Unlocks at Lv. 8.
Valley Map Access Requirements
Normal:
- Value Req: <450.000 Koens
Lockdown Zone:
- Value Req: >150.000 ~ 1.000.000 Koens
- Costs: 20.000 Koens for entry
Boss – Doss Anthony
 When the North and the South finally negotiated a ceasefire, Doss Anthony returned to the Valley from overseas, reorganized his forces, and settled there. Doss Anthony is the Boss of the Valley location. He is immediately recognizable by his unique gold gear and sunglasses. He has up to 10 bodyguards equipped with T2 to T3 armor and AP Ammo. Additionally in Lockdown raids, there will be one Faction Guard with him, a Blackgold or White Wolf contractor.
Can be found in:
- Doss can be found in the Beach Villa located in Valley.
Doss Anthony Spawn Chance = ~15%
Interactive Valley Map
*To Enable Full-Screen Mode, Press The Button On Map:![]()
Extractions Points
Here’s a list of all the extraction points available in Arena Breakout: Infinite’s Valley map:
| Name | Type | Details |
|---|---|---|
| Temporary Command Post | Fixed | Chance of Availability 100%. |
| Boat | Fixed | Chance of Availability 100%. |
| Helipad | Conditional | Deliver 2 dog tags to activate the extraction point. 1 Boss (Doss Anthony) Token in Forbidden Mode. |
| Road to City | Fixed | Chance of Availability 100%. |
| Coastal Highway Entrance | Fixed | Chance of Availability 100%. |
| Steel Bridge | Fixed | Chance of Availability 100%. |
| Pino Radio Station Extract | Fixed | Chance of Availability 100%. |
| Abandoned Shack | Chance-Based | An inconspicuous hut. Within is an underground passage leading to the outside world. Chance of Availability 50%. |
| Barn Extract | Covert Ops Extract | This Covert Ops Extract are only visible, and can only be used in the Covert Ops mode. |
| Factory Equipment Room | Conditional | The Small Factory’s equipment room. Fulfill the task condition to activate the extract point |
| Crash Site | Conditional | Search any 3 unsearched suitcases) as a team to extract. Chance of Availability 100%. |
Strategic Extraction at Beach Villa
One of Beach Villa’s unique features is its dedicated extraction point – a helipad located to the south of the compound. This extraction site is a double-edged sword. While it offers a quick escape from the dangers of Beach Villa, accessing it requires 2 dog tags. This requirement means you won’t always be able to rely on this extraction method, especially in the heat of battle.
Given the intense firefights that often break out here, it’s essential to have a solid plan for extraction. If the helipad isn’t an option, knowing alternative routes out of the area is crucial to avoid losing your hard-earned loot to other players or AI enemies.
The Valley Map Keys
The Valley is the second location that was added to the game, and there are not so many keys. These versatile items can unlock extract points, grant entry to restricted zones, and reveal coveted containers containing valuable items.
| Image | Name | Description | What’s inside | Durability | Price |
|---|---|---|---|---|---|
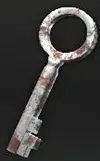 | Abandoned Shack Key | Key to the iron gate leading to the Abandoned Shack Extraction Point in the Valley. | Ammo Box, Document Case, Military Supply Case | 5 | Unavailable in Season 4 |
 | Radar Station Security Room Key | Key to the Valley Radar Station security room. The room contains some scientific tools. | Long Weapon Case, Working Clothes, Pro Toolbox | 15 | Unavailable in Season 4 |
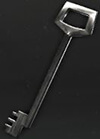
 | Staff Dormitory Key | A key can be used to open the door to the worker dormitory in the outskirts of the Port. Some valuables were left inside the dorms. | Safe, Duffle Bag, Winter Coat | 45 | ~400k |
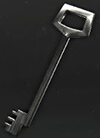
 | Factory Dressing Room Key | A key is used to open the Basement in the Courtyard. Several valuables are inside. | Safe, Long Weapon Box, Working Clothes | 45 | ~700k |
 | Beach Villa Main Bedroom Key | Key to the main bedroom on the second floor of the Beach Villa in the Valley. The owner left behind a lot of valuables. | Electronic Safe, Premium Weapon Case | 30 | ~2kk |
 | Factory File Room Key | A key was used to open the door to the Dressing Room in the small factory, Several valuables were left inside. | Safe, Large Weapon Case | 45 | ~220k |
 | Beach Villa Storage Key | Key to the storage room on the first floor of the Beach Villa in the Valley. The storage room holds expensive valuables that were left behind. | Safe, Medium Weapon Case | 30 | ~200k |
 | Valley Village Office Key | Key to the Valley Village Office. You might find something valuable inside. | Computer, First Aid Case | 15 | Unavailable in Season 4 |
 | RV Camp Cabin Cafeteria Key | Key to the log cabin Cafeteria in the Valley RV Camp. Once a popular dining spot for RV enthusiasts, it was later used as a stronghold by the locals. Rumor has it there are a lot of valuables there. | Safe, Long Weapon Box | 45 | ~200k |
 | Courtyard Basement Key | A key can be used to open the door to the worker dormitory on the outskirts of the Port. Some valuables were left inside the dorms. | Safe, Computer | 30 | ~700k |
Quick tip: sweep jackets, desks and small sheds first for early keys – they’re the usual spawn containers. Because Season 3 moved some spawns and made some keys unavailable, adjust your early-game plan if a key you expect is missing.
Points Of Interest
Arena Breakout Infinite’s Valley map offers expansive terrain with high-risk, high-reward locations that can set you up with top-tier loot, provided you know where to go and how to navigate the dangers.
Beach Villa: The Ultimate Loot Paradise
Beach Villa, situated in the southern region of the Valley map, is a hotspot for elite loot. This sprawling compound, composed of multiple interconnected buildings and intricate walkways, is not only a looter’s dream but also a trap waiting to spring on the unprepared. The maze-like structure makes it easy for enemy players to close in undetected, turning this area into a battleground where awareness and quick reflexes are crucial.
The rewards, however, make the risks worthwhile. Within Beach Villa, you can uncover two highly valuable safes, ten weapon crates brimming with gear, and numerous other containers like coats and suitcases that are often packed with essentials. Players who thoroughly scour this area are almost guaranteed to leave with a backpack full of high-quality loot, especially when tackling the map at higher difficulty levels.
Port: High-Value Loot in Minimal Time
Situated southwest of Beach Villa, Port is a prime location for quick and efficient looting. If you’re looking to hit multiple spots in a single run, Port is a perfect follow-up to Beach Villa. With one safe, seven weapon boxes, a grenade box, and various smaller containers and bags to explore, Port provides everything you need to equip yourself for the challenges ahead.
The majority of the loot at Port is conveniently located within the large storage facility, allowing you to gather essentials without having to traverse long distances. This compact layout makes Port an ideal location for players who want to gear up quickly and move on.
Noan Courtyard: A Strategic High-Risk, High-Reward Location
Perched atop a hill in the center of the Valley map, Noan Courtyard offers a commanding view of the surrounding area, making it both a strategic location and a hotbed for player activity. The loot here is distributed between two primary areas: the main villa on the hill and a nearby camp to the east.
As you ascend towards Noan Courtyard, the camp offers valuable loot opportunities. Here, you’ll find a safe, four weapon crates, a grenade crate, and medical boxes, along with various other containers. This area is well worth a thorough search before continuing up to the villa.
Loadouts & Weapon Advice for Valley
Valley mixes close interiors and long sightlines from the Noan hill and beach approaches — you need versatility.
- Solo/light: AR (mid-range, 4×) + pistol / SMG. Keep mobility for quick clears.
- Duos: AR + SMG pairing (one holds mid/long, one clears indoors). Bring a flash and at least one medkit each.
- Squads: One overwatch (DMR or AR with 6–8×), two room clearers (shotgun/SMG), one flexible midrange AR. Control Noan Hill for sightlines.
- Gear: Bring flashbangs for villa rooms, smoke for open beach approaches, and armor T3+ if you plan to contest Doss or Villa rooms.
FAQs
Supply Stations are seasonal gadgets that let you refill ammo/meds or trade small items; on Valley they appear near central points (Noan Courtyard, Factory, and Port). Use them mid-raid to resupply and avoid risky trips back to main loot areas.
Only if you have the required 2 dog tags and spawn into a low-player lobby. The helipad is highly conditional and extremely attractive to other players – solo attempts are high-risk unless timed carefully, or the map is quiet.
Hit Port → RV Camp → Small Factory outskirts, then head to a fixed extract (Temporary Command Post or Coastal Highway). Avoid the Villa unless you have backup.
Yes – use fog or rainy conditions to rotate quietly between buildings. Stealth works best for solo players or small duos who avoid Villa hotspots and focus on edge looting and quick-extract strategies.
Conclusion
New Season 3 (Breach) pushes Valley toward a more dynamic, choice-driven map: new supply systems, weather effects, and extraction tweaks reward players who scout, adapt, and time their rotations rather than those who rely on brute-force camping. Beach Villa and Port remain the high-payoff hotspots but are now balanced by improved mid-raid resupply and alternative routes – so pick your fights, prioritize keys and resupply, and rotate toward a fixed exit if the map gets chaotic.